Docker - Django + nginx + Slack
Date: 2016-07-10
This is a repository for deploying a Django + nginx stack using docker compose.
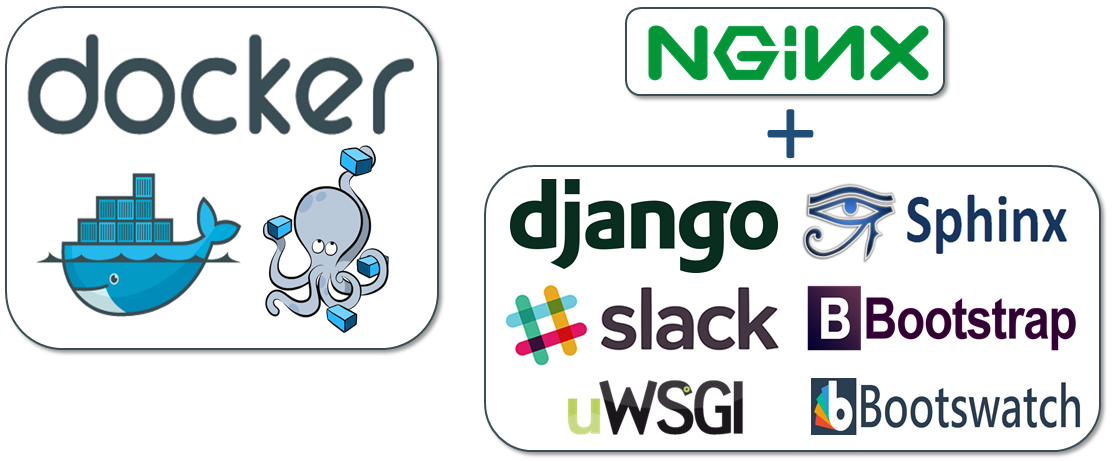
I built this to make running a Django + nginx website easier (and for decoupling my sites from only running on AWS EC2 AMIs). It uses docker compose to deploy two containers (django-nginx and django-slack-sphinx) and shares a mounted host volume between the two containers. For now, this runs Django 1.9 in uWSGI mode and publishes errors directly to a configurable Slack channel for debugging. By default the nginx container is running in non-ssl mode, but the container and repo include an ssl.conf file as a reference for extending as needed. There is also a way to run the Django server locally without docker and without uWSGI using the debug-django.sh script. The Django server also comes with two AJAX examples in the dj-ajax-demo.js file.
Overview
I built this composition for hosting a Django server that is easy to debug using a Slack integration because it publishes exceptions and automatically converts rst documentation into stylized html via the sphinx-bootstrap-theme with bootstrap and includes multiple bootswatch themes. For more details on the Slack workflow, please refer to my previous Slack driven development post.
The two containers mount a shared volume hosted at: /opt/web/ and Django deploys the static assets to /opt/web/static for hosting using nginx. Before now, I had to bake EC2 AMIs to run Django and nginx together and this just felt tedious to update and maintain. I want to have the option to not run on AWS and docker is a great tool for helping in this effort. I drink the docker kool-aid…containers make it easier to build, ship and run complex technical components like lego blocks. I also included directories for rebuilding or extending each container as needed in the repository.
Lastly, there has been a part of me that wanted to stop battling Django STATIC_ROOT 404 issues once and for all.
Google Integration
The Django server is ready-to-go with Google Analytics + Google Search Console.
Integrating with Google Analytics
Set your Google Analytics Tracking Code to the ENV_GOOGLE_ANALYTICS_CODE environment variable before starting the composition
Integrating with Google Search Console
Automatic sitemap.xml creation
On startup the Django container will automatically build a
sitemap.xmlfrom any files ending with a.rstextension in the repository’s docs directory and any routes in the urls.py file. Once the routes are processed the final sitemap.xml file is written and stored in the webapp directory. This is handy when you want to integrate your site into the Google Search Console and it should look similar to:
Automatic robots.txt creation
Like the sitemap.xml, on startup the Django container will host a
robots.txtfile at the site’s base FQDN like:https://jaypjohnson.com/robots.txt
For this initial release, the robots.txt file is just a flat, static file you can change anytime.
SEO Meta Data
SEO meta data is helpful when you share a link to your site over social media like Twitter, Facebook, Linkedin, and on Slack because they will automatically retrieve this meta data and embed the values into the post.
SEO meta data in the rst files
Each rst file can deploy SEO meta data in a hidden comments section
Note
Please make sure the rst meta data uses the existing tags prefixed with SEO_META_ as it is parsed and injected during the deployment of the container.
SEO meta data in the html files
Each html template file can deploy SEO meta data by storing it in a centralized JSON file that is referenced by the URL. On startup Django parses this JSON file and then whenever the page’s URL is requested the meta data is retrieved and passed using the template context for building the html template. Please refer to the Django Template documentation for more information on how these internals work.
Warning
Right now the | character is a reserved character in the SEO meta data values. Please do now use it with this release.
Slack Integration
This composition assumes you have a registered Slack bot that has been invited to the appropriate channel for posting messages. Please refer to the previous Slack driven development post for more details. With the Slack pieces set up, you can change the docker compose Slack env variables and then start the composition.
To disable the Slack integration just flip the ENV_SEND_EX_TO_SLACK environment variable to anything that is not True
To test the Slack integration is working you can browse to the site:
If it is working you should see the bot post a simple debugging message.
Compose Environment Variables
You can use the following environment variables inside the docker-compose.yml file to configure the startup and running behaviors for each container:
Variable Name |
Container |
Purpose |
Default Value |
|---|---|---|---|
ENV_BASE_HOMEDIR |
Django |
Base Home dir |
/opt |
ENV_BASE_REPO_DIR |
Django |
Base Repository dir |
/opt/containerfiles/django/ |
ENV_BASE_DATA_DIR |
Django |
Base Data dir for SQL files |
/opt/containerfiles/django/data/ |
ENV_BASE_DOMAIN |
Django |
Base URL domain FQDN for the site |
jaypjohnson.com |
ENV_STATIC_OUTPUT_DIR |
Django |
Output files dir for static files (js, css, images) |
/opt/web/static |
ENV_MEDIA_DIR |
Django |
Output and upload dir for media files |
/opt/web/media |
ENV_SLACK_BOTNAME |
Django |
Name of the Slack bot that will notify users |
bugbot |
ENV_SLACK_CHANNEL |
Django |
Name of the Slack channel |
debugging |
ENV_SLACK_NOTIFY_USER |
Django |
Name of the user to notify in the Slack channel |
jay |
ENV_SLACK_TOKEN |
Django |
Slack bot api token for posting messages |
xoxb-51351043345-Lzwmto5IMVb8UK36MghZYMEi |
ENV_SLACK_ENVNAME |
Django |
Name of the application environment |
djangoapp |
ENV_GOOGLE_ANALYTICS_CODE |
Django |
Google Analytics Tracking Code |
UA-79840762-99 |
ENV_DJANGO_DEBUG_MODE |
Django |
Debug mode for the Django webserver |
True |
ENV_SERVER_MODE |
Django |
Django run mode (non-prod vs uWSGI) |
PROD |
ENV_DEFAULT_PORT |
Django |
Django port it will listen on for traffic |
85 |
ENV_PROJ_DIR |
Django |
Django project dir |
/opt/containerfiles/django/wsgi/server/webapp/ |
ENV_DOC_SOURCE_DIR |
Django |
Blog Source dir (not used yet) |
/opt/web/django/blog/source |
ENV_DOC_OUTPUT_DIR |
Django |
Blog Template dir (not used yet) |
/opt/web/django/templates |
ENV_BASE_NGINX_CONFIG |
nginx |
Provide a path to a base_nginx.conf |
/root/containerfiles/base_nginx.conf |
ENV_DERIVED_NGINX_CONFIG |
nginx |
Provide a path to a non_ssl.conf |
/root/containerfiles/non_ssl.conf |
ENV_DEFAULT_ROOT_VOLUME |
Both |
A mounted host Volume for sharing files |
/opt/web |
Warning
Please make sure the django-nginx and django-slack-sphinx containers use the same base ENV_DEFAULT_ROOT_VOLUME directory.
Docker Compose File
This composition is using a version 2 docker-compose.yml. It is setup to only expose ports 80 and 443 for nginx. It also specifies a default bridge network for allowing nginx to route http traffic to the Django webserver using uWSGI options and a shared volume /opt/web/static for deploying static assets (js, css, images) for nginx hosting.
version: '2'

services:

  webnginx:
    image: jayjohnson/django-nginx:1.0.0
    container_name: "webnginx"
    hostname: "webnginx"
    environment:
      - ENV_BASE_NGINX_CONFIG=/root/containerfiles/base_nginx.conf
      - ENV_DERIVED_NGINX_CONFIG=/root/containerfiles/non_ssl.conf
      - ENV_DEFAULT_ROOT_VOLUME=/opt/web
    ports:
      - "80:80"
      - "443:443"
    volumes:
      - /opt/web:/opt/web
    networks:
      - webstack

  webserver:
    image: jayjohnson/django-slack-sphinx:1.0.0
    container_name: "webserver"
    hostname: "webserver"
    environment:
      - ENV_BASE_HOMEDIR=/opt
      - ENV_BASE_REPO_DIR=/opt/containerfiles/django
      - ENV_BASE_DATA_DIR=/opt/containerfiles/django/data
      - ENV_DEFAULT_ROOT_VOLUME=/opt/web
      - ENV_DOC_SOURCE_DIR=/opt/web/django/blog/source
      - ENV_DOC_OUTPUT_DIR=/opt/web/django/templates
      - ENV_STATIC_OUTPUT_DIR=/opt/web/static
      - ENV_MEDIA_DIR=/opt/web/media
      - ENV_DJANGO_DEBUG_MODE=True
      - ENV_SERVER_MODE=PROD
      - ENV_DEFAULT_PORT=85
      - ENV_PROJ_DIR=/opt/containerfiles/django/wsgi/server/webapp
      - ENV_BASE_DOMAIN=jaypjohnson.com
      - ENV_SLACK_BOTNAME=bugbot
      - ENV_SLACK_CHANNEL=debugging
      - ENV_SLACK_NOTIFY_USER=jay
      - ENV_SLACK_TOKEN=xoxb-51351043345-Lzwmto5IMVb8UK36MghZYMEi
      - ENV_SLACK_ENVNAME=djangoapp
      - ENV_SEND_EX_TO_SLACK=True
      - ENV_GOOGLE_ANALYTICS_CODE=UA-79840762-99
    volumes:
      - /opt/web:/opt/web
    networks:
      - webstack

networks:
  webstack:
    driver: bridge
Creating a New Technical Document
I built this to host dynamic technical content that automatically converts rst files into stylized html using Sphinx and sphinx-bootstrap-theme discussed in the previous how to host a technical blog post. Just add a new rst file to the rst document directory and restart the Django webserver (or the composition) to see the new posting on the http://localhost/docs/docs.html page.
Tuning Django uWSGI
If the composition is setup to run in PROD mode the Django container will run using uWSGI. It uses the django-uwsgi.ini configuration file and specifies the experimental thunder lock performance option. The default configuration file tells uWSGI to run with 2 processes and 4 threads per process.
$ cat django-uwsgi.ini
[uwsgi]
socket = 0.0.0.0:85
chdir = /opt/containerfiles/django/wsgi/server
wsgi-file = webapp/wsgi.py
processes = 2
threads = 4
Note
This may not be an ideal configuration for all cases, but it is easy enough to change and rebuild the Django docker container.
Warning
The --thunder-lock parameter is an experimental feature. To disable it just change the compose file’s ENV_SERVER_MODE value from PROD to STANDARD (anything not DEV or PROD).
Building Containers
To build both containers just run:
$ ./build-containers.sh
Install and Setup
Create the
/opt/webdirectory$ mkdir -p /opt/web && chmod 777 /opt/web
Start the composition
$ ./start_composition.sh
Starting Composition: docker-compose.yml
Starting webserver
Starting webnginx
Done
$
Test the
http://localhost/home/page works from a browser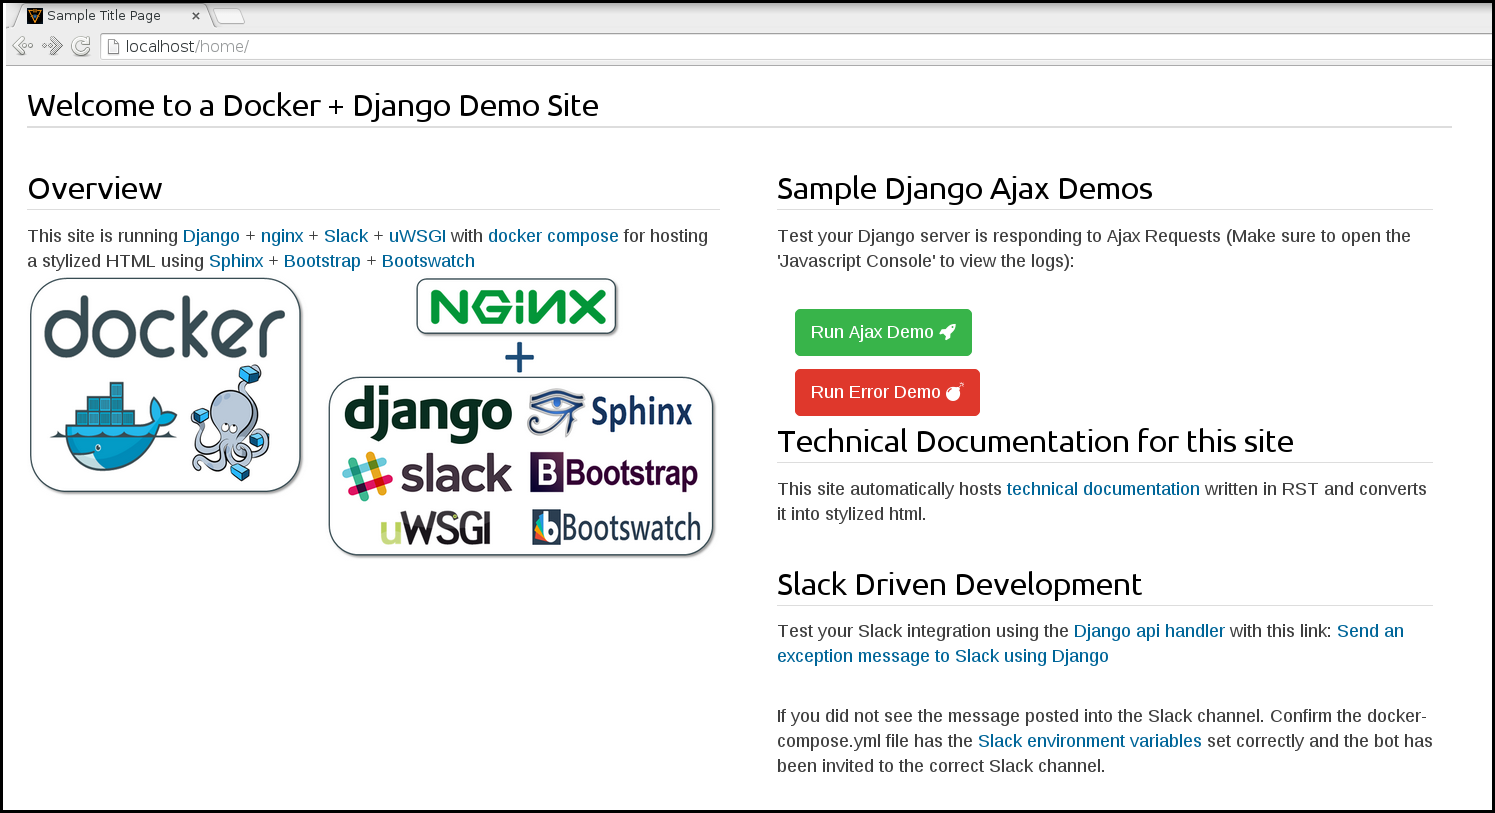
Test the
http://localhost/home/page works from the command line$ curl -s http://localhost/home/ | grep Welcome <h1>Welcome to a Docker + Django Demo Site</h1> $
Stopping the site
To stop the site run:
$ ./stop_composition.sh
Stopping the Composition
Stopping webnginx ... done
Stopping webserver ... done
Done
$
Cleanup the site containers
If you want to stop and cleanup the site and docker containers run these commands:
Check the site containers are running
$ docker ps -a
12107eaffda7        jayjohnson/django-nginx:1.0.0          "/root/containerfiles"   15 minutes ago      Up 14 minutes       0.0.0.0:80->80/tcp, 0.0.0.0:443->443/tcp           webnginx
783474ddcd77        jayjohnson/django-slack-sphinx:1.0.0   "/opt/containerfiles/"   About an hour ago   Up 14 minutes       80/tcp, 443/tcp                                    webserver
$
Stop the composition
$ ./stop_composition.sh
Stopping the Composition
Stopping webnginx ... done
Stopping webserver ... done
Done
$
Remove the containers
$ docker rm webnginx webserver
webnginx
webserver
$
Remove the container images
$ docker rmi jayjohnson/django-nginx:1.0.0 jayjohnson/django-slack-sphinx:1.0.0
Remove the site’s static directory
$ rm -rf /opt/web/static
Running Django without Docker or uWSGI
Here are the steps to run Django locally without docker and without uWSGI.
Install these pips on the host
$ sudo pip install sphinx slackclient uuid sphinx_bootstrap_theme requests django-redis MySQL-python psycopg2 pymongo SQLAlchemy alembic
Create the deployment workspace
$ mkdir -p -m 777 /opt/containerfiles
Run the debug-django.sh deployment script
$ ./debug-django.sh

Starting Django in debug mode

Destroying previous deployment

Creating temp Sphinx static dir

Installing new build

Deploying Django
     - To debug the deploy-django.sh script run: tail -f /tmp/docsdeploy.log

Deploying Docs
     - To debug the deploy-docs.sh script run: tail -f /tmp/deploy.log

Starting Django Server with home page: http://localhost:8000/home/
Performing system checks...

System check identified no issues (0 silenced).
July 10, 2016 - 02:51:48
Django version 1.8.3, using settings 'webapp.settings'
Starting development server at http://0.0.0.0:8000/
Quit the server with CONTROL-C.
Confirm the Django website is available at:
http://localhost:8000/home/
AJAX Examples
There are two AJAX examples included in the server. Both of which are handled by the dj-ajax-demo.js file and available on the http://localhost/home/ page (just click the green and red buttons).
Sample Good AJAX Request
The javascript handles the Good AJAX example in the ajax_run_demo method
Sample Error AJAX Request
The javascript handles the Error AJAX example in the ajax_error_demo method
Django Post Handling
Under the hood, the Django server handles these request in the same POST handler method which then passes the request object to the specific handle post AJAX demo method. The only difference between the Good case versus the Error case is that the javascript changes the requested data key from SendToServer to TheServerDoesNotSupportThisKey. The Django server examines these keys and returns the response based off the input validation passing or failing.
Licenses
This repository is licensed under the MIT license.
The Django license: https://github.com/django/django/blob/master/LICENSE
The nginx license: http://nginx.org/LICENSE
Sphinx Bootstrap Theme is licensed under the MIT license.
Bootstrap v2 is licensed under the Apache license 2.0.
Bootstrap v3.1.0+ is licensed under the MIT license.
Bootswatch license: https://github.com/thomaspark/bootswatch/blob/gh-pages/LICENSE
Thanks for reading!
Until next time,
Jay