Host a Technical Blog with Docker
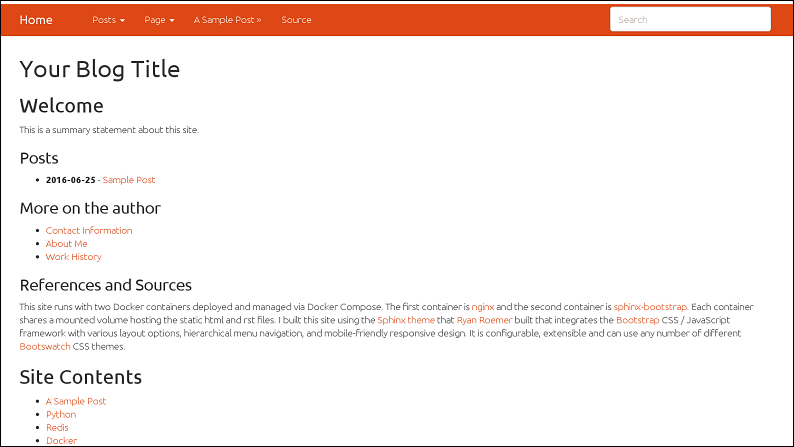
Sample screenshot from a new deployment
Date: 2016-06-25
I built this repository for hosting my own technical blog + resume + work portfolio. It uses docker compose to deploy my nginx and sphinx-bootstrap containers and shares a mounted volume across the two containers.
I use this repository for hosting:
Docker Hub Image(s): jayjohnson/nginx and jayjohnson/sphinx-bootstrap
Container Repo(s): docker-nginx and docker-sphinx-bootstrap
Overview
I built this composition for hosting a nice-to-read blog that made it easy to generate content instead of battling formatting. Now I can write a post using reStructuredText Markup and the python Sphinx bootstrap documentation tooling converts each rst file into readable, static html which is hosted using the nginx container for HTTP traffic on port 80 (or 443) to the static html files. Once I containerized the sphinx-bootstrap-theme I added automatic integration with Google Analytics + Google Search Console for others looking to do the same thing. I like that out-of-the-box the sphinx-bootstrap-theme comes with support for multiple bootswatch themes and there are even more themes available from the bootswatch repository and bootswatch website. Additionally it is nice to know that this blog is already mobile-ready because it is built using bootstrap.
Integrating with Google Analytics
Set your Google Analytics Tracking Code to the ENV_GOOGLE_ANALYTICS_CODE environment variable before container creation
During container startup the environment variable
ENV_GOOGLE_ANALYTICS_CODEwill be automatically installed into the default html layout on every page across your site
Integrating with Google Search Console
Automatic sitemap.xml creation
When the container starts or you manually rebuild the html content it will automatically build a
sitemap.xmlfrom any files ending with a.rstextension in the repository’s root directory. This file is stored in the environment variableENV_DOC_OUTPUT_DIRdirectory. This is handy when you want to integrate your site into the Google Search Console and it should look similar to: https://jaypjohnson.com/sitemap.xml
What can I use it for?
After working with the Levvel team over the past year, I realized the importance of having a blog to demonstrate technical expertise. After watching wordpress lose my work, I knew there had to be a better way. Recently, my friend Alex Smith recommended I check out Sphinx because it made documentation even easier than traditional markdown. After finding the python Sphinx bootstrap repository I knew I wanted to drop this into a docker container so I could deploy content while keeping the nginx services up and running.
I now use this repository as my blog for technical posts, hosting my projects and stack discussions, work history, resume, and contact information. I find it so much easier to write an rst file and let the framework translate it into formatted, stylized html. Now I can focus on content instead of the presentation (which is nice because I am not a web developer or artist).
Other interesting out-of-the-box features are:
A native
Searchbar on each pageEach page has a
Sourcebutton in the navigation bar to quickly inspect the originalrstmarkup data
Install and Setup
I am running the docker containers on an Amazon EC2 t1.micro with a Route 53 dns alias record set to route jaypjohnson.com traffic to the micro.
On the EC2 micro I ran these commands to setup and deploy the site:
Create the
/opt/blogdirectory$ mkdir -p /opt/blog/ && chmod 777 /opt/blog
Clone this repo
$ cd /opt/blog
$ git clone https://github.com/jay-johnson/docker-nginx-sphinx-bootstrap.git repo
$ cd repo
$
Start the composition
$ ./start_composition.sh
Creating websphinx
Creating webnginx
Done
$
Test the blog
$ curl -s http://localhost:80 | grep Welcome | grep h2
<h2>Welcome<a class="headerlink" href="#welcome" title="Permalink to this headline">¶</a></h2>
$
Compose Environment Variables
You can use the following environment variables inside the docker-compose.yml file to configure the container startup behaviors:
Variable Name |
Purpose |
Default Value |
|---|---|---|
ENV_BASE_NGINX_CONFIG |
Provide a path to a base nginx.conf |
/root/containerfiles/base_nginx.conf |
ENV_DERIVED_NGINX_CONFIG |
Provide a path to a derived nginx.conf |
/root/containerfiles/derived_nginx.conf |
ENV_DEFAULT_ROOT_VOLUME |
Path to shared volume for static html, js, css, images, and assets |
/opt/blog |
ENV_DOC_SOURCE_DIR |
Input directory where Sphinx processes |
/opt/blog/repo/source |
ENV_DOC_OUTPUT_DIR |
Output directory where Sphinx will output the |
/opt/blog/repo/release |
ENV_BASE_DOMAIN |
Your web domain like: |
|
ENV_GOOGLE_ANALYTICS_CODE |
Your Google Analytics Tracking Code like: |
UA-79840762-99 |
Warning
Please make sure the nginx and sphinx-bootstrap containers use the same base ENV_DEFAULT_ROOT_VOLUME directory and that the rst files are stored inside the ENV_DOC_SOURCE_DIR and the html output files can be written to the ENV_DOC_OUTPUT_DIR directory
Here is how my EC2 host has the shared directory set up
$ ls /opt/blog/repo/
docker-compose.yml  Makefile  nginxssh.sh  README.rst  source  sphinxssh.sh  start_composition.sh  stop_composition.sh
$
Note
The release directory will not be present until you start the composition the first time
Want to add a new blog post?
Open a new
new-post.rstfile in thesourcedirectoryAdd the following lines to the new
new-post.rstfile:================== This is a New Post ================== My first blog post
Edit the
index.rstfile and find theSite ContentssectionAdd a new line to
Site Contentstoctree section containing:new-postHere is how mine looks after adding it to the
index.rstSite Contents ------------- .. toctree:: :maxdepth: 2 new-post python work-history contact about
Note
One nice feature of the sphinx framework is it will automatically label the link with the first Title inside the file.
Save the
index.rstfileDeploy and Rebuild the html files
Inside the
websphinxcontainer I included a deploy + rebuild script you can run from outside the container with:$ docker exec -it websphinx /root/containerfiles/deploy-new-content.sh
Test the new post shows up in the site
$ curl -s http://localhost:80/ | grep href | grep toctree | grep "New Post"
<li class="toctree-l1"><a class="reference internal" href="new-post.html">This is a New Post</a></li>
<li class="toctree-l1"><a class="reference internal" href="new-post.html">This is a New Post</a></li>
$
Stopping the site
To stop the site run:
$ ./stop_composition.sh
Stopping the Composition
Stopping webnginx ... done
Stopping websphinx ... done
Done
$
Cleanup the site containers
If you want to stop and cleanup the site and docker containers run these commands:
Check the site containers are running
$ docker ps -a
CONTAINER ID        IMAGE                               COMMAND                  CREATED             STATUS              PORTS                                      NAMES
4159eb49d9d2        jayjohnson/nginx:1.0.0              "/root/containerfiles"   20 minutes ago      Up 50 seconds       0.0.0.0:80->80/tcp, 0.0.0.0:443->443/tcp   webnginx
f0ba0a7d0f4b        jayjohnson/sphinx-bootstrap:1.0.0   "/root/containerfiles"   20 minutes ago      Up 50 seconds                                                  websphinx
$
Stop the composition
$ ./stop_composition.sh
Stopping the Composition
Stopping webnginx ... done
Stopping websphinx ... done
Done
$
Remove the containers
$ docker rm webnginx websphinx
webnginx
websphinx
$
Remove the container images
$ docker rmi jayjohnson/nginx:1.0.0 jayjohnson/sphinx-bootstrap:1.0.0
Remove the blog directory
$ rm -rf /opt/blog/repo
Licenses
This repository is licensed under the MIT license.
The nginx license: http://nginx.org/LICENSE
Sphinx Bootstrap Theme is licensed under the MIT license.
Bootstrap v2 is licensed under the Apache license 2.0.
Bootstrap v3.1.0+ is licensed under the MIT license.
Note
Update from 2016-06-29 - I was curious if the EC2 t1.micro would fall apart when users found the site. I am pleased that it only hit a max cpu utilization around 25%, and Google Analytics reported 622 pageviews during the same timeframe. Here’s the monitoring screenshot from the EC2 web console:
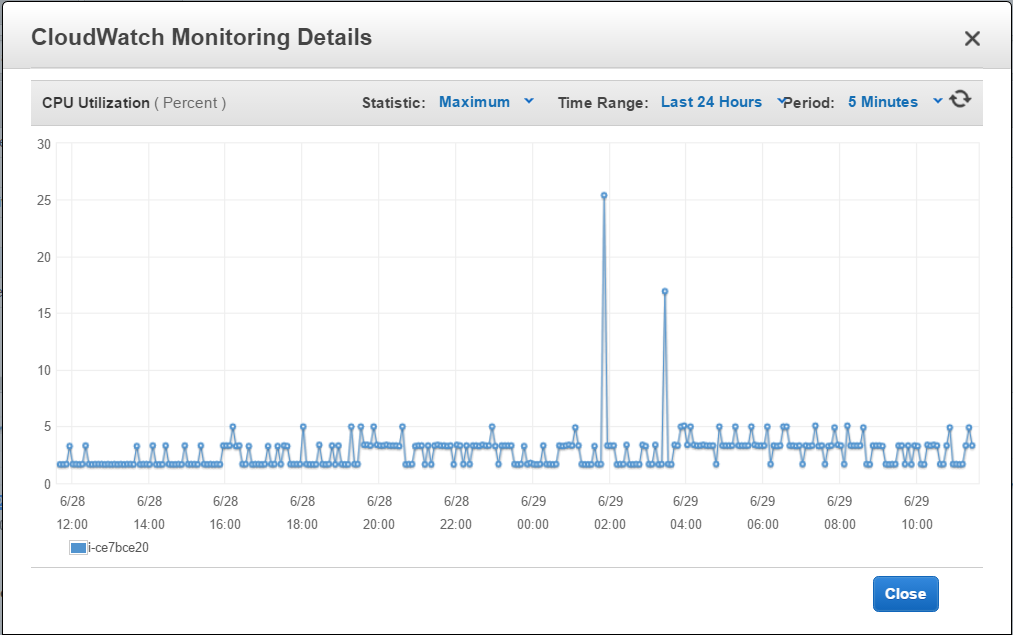
AWS EC2 t1.micro - CPU Utilization from 2016-06-28 to 2016-06-29
Thanks for reading,
Jay